Since the invention of 3D printing in the 1980s, the technology has developed into a robust manufacturing solution for simple and more demanding prototyping as well as more complex, industrial applications.
Engineers, designers, startups and established businesses can use 3D printing to work through their prototype development cycle. From basic look-and-feel models to bespoke custom parts for R&D or later-stage product testing, custom tooling and even end-use parts or large assemblies, 3D printing offers a variety of solutions.
Today, we offer a wide range of 3D printing technologies for prototyping, from simpler processes like FDM (fused deposition modeling) using filament-based materials, to more complex ones like MJF (HP's Multi-Jet Fusion), which uses powder-based materials that are optimal for inserts, threads and painted surfaces.
Let’s break down the 3D printing technologies available through our manufacturing network.
How do you select the best 3D printing process for prototyping?
Depending on your product application, there are several factors to consider when identifying the best 3D printing technology and process for your prototyping needs. These include your intent for the prototype (visual, functional, testing, high-volume or end-use) and your priorities and budget for the specific stage of development.
It’s essential to determine early in the process whether functionality or cosmetic appearance is your first priority. This will help you select the right 3D printing process. As well, when more than one process can produce prototypes in similar materials, choosing becomes a cost versus properties comparison.
Here are a few more general rules of thumb we use at Protolabs Network.
-
For quick, inexpensive components for fit or proof of concept, we recommend FDM.
-
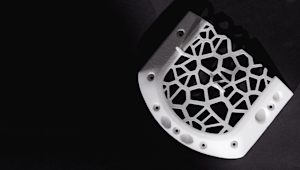
For functional polymer parts, we prefer thermoplastics (SLS or MJF) over thermosets.
-
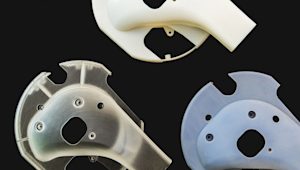
For visual appearance and aesthetics, thermosets (SLA) are the best option.
-
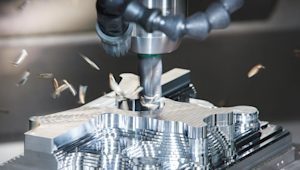
For highly accurate, low-volume functional prototypes in metal or plastic, also consider CNC machining.

What are the key manufacturing criteria for your prototype? Dimensional accuracy, build size & support structures
It’s important to have an overview of the fundamental mechanics of each 3D printing process to fully understand the key benefits and limitations that will sway which matches your application.
Let’s break down key criteria to cover when prototyping with 3D printing.
Dimensional Accuracy is connected to the level of detail each process can achieve and the build quality of each 3D printer. Processes that offer higher accuracy can usually create parts with finer features. Industrial-grade machines have higher accuracy and repeatability than desktop printers. Layer height (mostly relevant in FDM) impacts dimensional accuracy.
If you’re designing a prototyping part that will come into contact with other components, it’s critical that you define the necessary tolerances. As selecting a process with higher dimensional accuracy may increase your costs, you can also finish features with critical dimensions or small details after 3D printing (for example, by drilling holes or tapping threads).
Build Size determines the maximum dimensions of a part that a 3D printer can produce. For components that exceed the typical build size, consider migrating to an alternative technology or splitting the part into multiple components that can be assembled later.
Support structures determine the level of design freedom and affect how much post-processing to expect. Processes that require no support, like SLS or industrial FDM using Ultem, have fewer limitations and can produce free-form structures with greater ease.
| Dimensional accuracy | Typical build size | Support | |
|---|---|---|---|
| FDM | Prototyping: ± 0.5% (lower limit ± 0.5 mm) Industrial: ± 0.15% (lower limit ± 0.2 mm) | 200 x 200 x 200 mm for desktop printers. Up to 900 x 600 x 900 mm for industrial printers | Not always required (dissolvable available) |
| SLA | Prototyping: ± 0.5% (lower limit: ± 0.10 mm) Industrial: ± 0.15% (lower limit ± 0.05 mm) | 145 x 145 x 175 mm for desktop. Up to 1500 x 750 x 500 mm for industrial printers | Always required |
| SLS/MJF | ± 0.3% (lower limit: ± 0.3 mm) | 300 x 300 x 300 mm (up to 750 x 550 x 550 mm) | Not required |
Another important aspect to consider when choosing a technology is the impact of layer height.
Due to the additive nature of 3D printing, layer height determines the smoothness of the as-printed surface and the minimum feature size a printer can produce (in the z-direction). Using a smaller layer height also makes the stair stepping effect less prominent and helps produce more accurate curved surfaces.
| Typical layer thickness | |
|---|---|
| FDM | 50 - 400 μm (most common: 200 μm) |
| SLA/DLP | 25 - 100 μm (most common: 50 μm) |
| SLS | 80 - 120 μm (most common: 100 μm) |
3D printing for basic prototyping - manufacturing with FDM
If you’re looking to build a basic prototype on a budget - to visualize a part or design, check the look and feel, and have a rough idea of form, fit and function - FDM may be the best 3D printing option.
It’s important to remember that FDM uses filament-based thermoplastics. As such, parameters like infill and layer resolution will impact the accuracy and cost of your custom parts. The more infill you have, the more material you will need, raising the cost.
As an extrusion-based printing method, FDM comes with its own design limitations and requires support structures in many instances. FDM machines can only make one part at a time, so if you have higher volumes of parts, then SLS and MJF may be more suitable. These technologies are suitable for volume prototyping as they can print multiple parts at the same time.

3D printing for complex prototyping - manufacturing with SLA, SLS & MJF
If you aim to build more complex, highly accurate prototypes to test form, fit and function (or want to test parts for durability and strength), you will get the most out of SLA, SLS and MJF. For more complex prototyping, SLA, SLS and MJF are more efficient and easier to scale, and in many cases, the most cost-effective option, especially for the part quality you get.
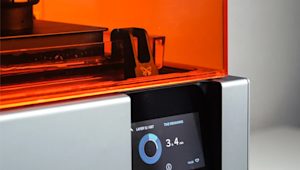
In terms of the materials these processes use, SLA uses liquid photopolymer resins and SLS and MJF use powder materials, so there’s nothing to remove after printing. SLA does use support structures, so if you’re printing intricate or detailed features, you’ll want to factor in removal time.
Post-processing time is important to consider, especially when prototyping at higher volumes. With SLA, time is required to cure liquid resin, and ensure parts dry properly (referring back to the extra time needed to remove supports)
In contrast, SLS and MJF powder materials require time to cool and need to be able to be cleaned easily. Intricate or detailed features could result in cracked, blocked or filled internal holes/channels that can’t be cleaned. Designs should allow for cleaning, powder removal and sufficient cooling to ensure highly accurate prototypes.

What materials do 3D printers use?
Depending on the 3D printing technology you are using, materials usually come in filament, powder or resin form. The two main 3D printing material groups are polymers (plastics) and metals, while other materials such as ceramics (one of the newest materials to be used in 3D printing) or composites (perfect for strong, lightweight parts) are also available.
Polymers can be broken down further into thermoplastics and thermosets. The main difference between these two designations is how they behave when heated. When you heat thermosets, the material gets stronger, but can’t be remolded or heated after the initial forming. In contrast, you can reheat, remold and cool thermoplastics as necessary without leading to any chemical changes.
Different technologies are built to print with certain materials more optimally than others, with the level of accuracy and material cost becoming mitigating factors.
What are thermoplastics and thermosets?
Thermoplastics are the most commonly used type of plastic. The main feature that differentiates them from thermosets is that they can go through numerous cycles of melting and solidifying. This means that you can reverse the process of heating and forming thermoplastics into the desired shape.
As no chemical bonding takes place when you heat and form thermoplastics, you can recycle or melt and reuse them. One way to think about thermoplastics is to liken them to butter. You can repeatedly melt and resolidify butter, and with each melting cycle, its properties only change slightly.
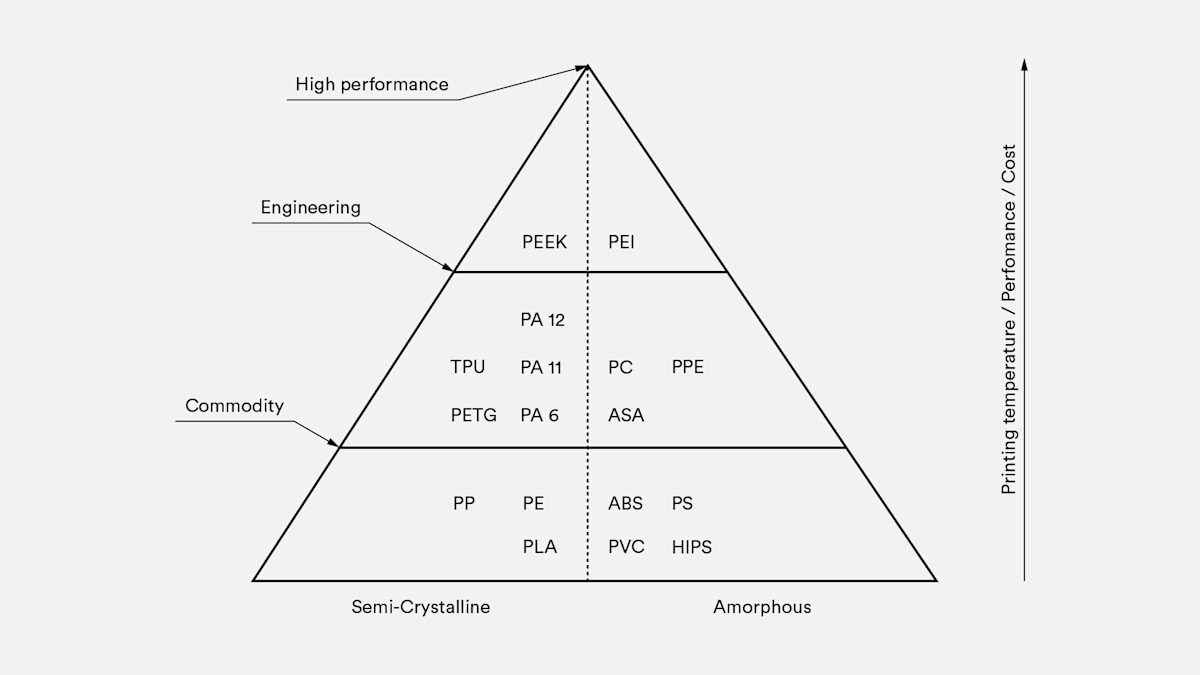
Thermoplastics have good mechanical properties and high impact, abrasion and chemical resistance. They can also be filled with carbon, glass or other additives to enhance their physical properties. Engineering thermoplastics, such as Nylon, PEI and ASA, are widely used to produce end-use parts for industrial applications.
Overall, thermoplastics are best suited for manufacturing functional prototypes and some end-use parts. It’s important to note that thermoplastic products are not suitable for load-bearing applications.
Thermosets (also known as thermosetting polymers or plastics), in contrast to thermoplastics, remain in a solid state after a single round of curing. They are better suited for applications where aesthetics are important, as they can produce parts with smooth surfaces (similar to what injection molding produces) and fine details.
Generally, they have high stiffness but are more brittle than thermoplastics, so they are not suitable for functional applications. Specialty resins are available, that are designed for engineering applications (mimicking the properties of ABS and PP) or dental inserts and implants.
Common thermosets include phenolic, epoxy, silicon and polyurethane, which provide various benefits for production. Epoxies, for example, are tough, resistant to a wide range of chemicals and highly elastic.
| Typical 3D printing thermosets (resins) | |
|---|---|
| SLA | Standard resin, Tough resin (ABS-like), Durable resin (PP-like), Clear resin, Dental resin |
Ready to start prototyping with 3D printing?
Frequently asked questions
Why is 3D printing ideal for prototyping?
3D printing provides more design and production flexibility than other manufacturing technologies. As 3D printers build objects from digital models, you can easily create any type of design you want. The only limitations will come from the specific technologies you choose to produce your simple or intricate models. 3D printing lets you fail swiftly and more often, so you can get to the best iteration of your product faster.
Which industries use 3D printing for prototyping?
Many industries across nearly every sector leverage the power of 3D printing to add efficiency and design freedom to the prototyping process. It’s actually quite challenging to find an industry that doesn’t use 3D printing. The automotive industry, for instance, uses SLS and MJF for many prototypes, while the medical field is filled with prototypes made using SLA and SLS.
Is 3D printing the same as rapid prototyping?
While 3D printing and rapid prototyping are often closely linked, they are distinct from one another. 3D printing is the additive manufacturing process itself and rapid prototyping is the quick fabrication of physical parts and assemblies using CAD (3D computer-aided design). Additive manufacturing is the most common method for rapid prototyping.
What are the best materials for 3D printing prototypes?
Depending on what kind of prototyping you’re hoping to build (from proof of concepts to initial product runs), every material available for 3D printing has its advantages. For instance, you can use PLA if you’re just looking to see your design rendered in the physical world. SLA is optimal for showing a design to potential customers at a tradeshow. And for proving the functionality of your design, you can go with Nylon.
