When one part of a component tries to slide past another, that's shear stress at work. In this article, we cut through the complexity to show what it is, how to calculate it, and how to design parts that stand strong under shear.
Introduction to shear stress and shear load
Shear is one of the three basic types of mechanical stress, but it often gets less attention than tension and compression. Understanding it is essential because many real-world failures happen due to shear.
Shear Load (or Shear Force)
The external force applied tangentially (parallel) to a surface, creating a tendency for layers to slide past each other. Think of pushing a block of wood with opposing forces—one up and one down—so it slides along a plane. Shear load is measured in Newtons (N) or pounds (lbf).
Shear Stress
The internal resistance within the material that opposes sliding, defined per unit area. Picture pushing one sheet of paper across another—your hand applies the load, the paper resists through shear stress.
In short, shear load is the outside force, shear stress is the inside resistance, and failure happens when stress exceeds what the material can handle.
Shear strength ranges
| Shear resistance | Strength range (psi) |
|---|---|
| Excellent | 40,000+ |
| Good | 20,000–40,000 |
| Moderate | 5,000–20,000 |
| Limited | 1,000–5,000 |
| Poor | < 1,000 |
Why shear stress and shear load matter
Everyday parts like bolts, beams, and adhesives are under constant shear forces. These forces often govern whether a design holds or fails, even when tension and compression seem safe. In fact, many failures blamed on tension or compression start with shear. The scary part is that shear failures often happen suddenly, without much warning.
When shear dominates your design
-
Bolts, pins, and fasteners (load across diameter)
-
Short, thick sections under load
-
Adhesive and welded joints
-
Keys, splines, and rotating connections
-
Punched or stamped edges in sheet metal
Shear stress basics and formulas
To work with shear in design, you need the basics of how it’s calculated. The good news is the formulas are straightforward and widely used.
τ = F/A
Where τ = shear stress, F = shear force, and A = area resisting shear.
Example: A 1/4" steel pin carrying 2,000 lbf has an area of 0.049 in², so shear stress = 40,800 psi. Since steel handles ~40,000–60,000 psi, the pin is at its limit.
For torsion on shafts:
τ_max = Tr/J
Where T = torque, r = radius, J = polar moment of inertia.
Example: A 1" shaft under 500 lb-in torque sees ~2,550 psi shear stress—well within limits.
Understanding how materials respond to different types of stress helps you predict failure modes. For a deeper dive into how stress and strain relate across different loading conditions, see our guide on material stress vs. strain.
Shear vs. tensile vs. compressive stress
To put shear into context, it helps to compare it with the other two basic stresses:
-
Tensile stress: Pulling loads, like cables and rods.
-
Compressive stress: Squashing loads, like columns.
-
Shear stress: Sliding loads, like bolts and welds.
Metals usually show shear strengths around 50–80% of their tensile strength. This means a steel that can handle 60,000 psi in tension might only handle 40,000 psi in shear.
Even when tension or compression seems to dominate your design, shear may actually control failure. A bolt holding two plates together is a good example. It looks like it's under tension, but it's actually loaded in shear across its diameter.
Material behavior in shear
Understanding how different materials behave in shear can help you predict how they’ll fail. Some stretch and bend before breaking, while others snap suddenly.
Ductile materials
-
Behavior: Can bend and stretch before breaking, giving warning before failure.
-
Examples: Steels and most metals
-
Yield shear strength: ~150–300 MPa
-
Ultimate shear strength: ~200–600 MPa
Brittle materials
-
Behavior: Break suddenly with little warning.
-
Examples: Ceramics, some plastics
-
Ultimate shear strength: often <100 MPa
Fiber composites
-
Behavior: Performance depends heavily on fiber orientation and matrix.
-
Examples: CFRP, GFRP
-
Typical shear strength: 40–120 MPa
Design examples under shear
Real components carry loads in specific ways. These examples show where shear forces matter most:
-
Bolts and pins: The pin resists sliding across its width. In single-shear joints, load is carried across one plane. In double-shear joints (supported on both sides), the load is carried across two planes, nearly doubling capacity.
-
Lap joints: Welded, glued, or fastened overlaps transfer load through shear. Longer or thicker joints hold more, and engineers often prefer double-lap joints over single-lap joints to balance load and reduce bending.
-
Keys and keyways: Stop shafts and hubs from spinning apart by sharing torque through shear faces.
-
Snap-fits: Rely on material flex without breaking in shear. Stress at the root is critical.
-
Adhesives: Work best in shear. Avoid peel loads whenever possible.
-
Sheet metal tabs: Edges carry shear load. Clean cuts and good thickness improve strength.
Testing shear strength
Testing shear strength gives reliable numbers instead of estimates. Standardized methods make it easy to compare results across materials and designs.
-
Lap-shear test: Two flat pieces of material are overlapped and bonded, then pulled apart until the joint fails. This is commonly used for adhesives and welds to measure how well the joint resists sliding.
-
Punch shear test: A punch tool presses through a sheet until it shears out a slug of material. This simulates how sheet metals fail in punching or stamping operations.
-
Torsion test: A cylindrical piece (like a shaft or rod) is clamped and twisted until it fails. This shows how materials behave in shear under rotational loads.
Manufacturing considerations
How a part is made can change its ability to resist shear. Surface finish, defects, and microstructure all play a role.
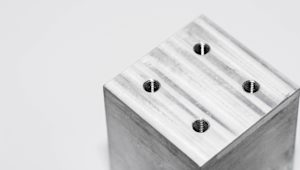
-
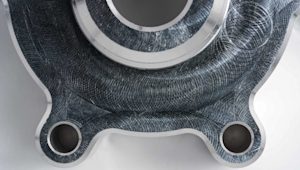
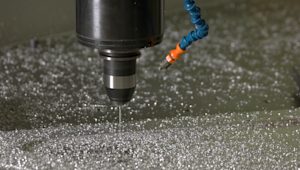
CNC machining: Machined holes and bores often carry shear loads. Smooth, accurate surfaces spread loads evenly, while rough edges create weak spots.
-
Sheet metal fabrication: Punching and stamping leave shear edges that can harden or form burrs. Clean, deburred edges reduce crack formation.
-
Injection molding: Molded parts may have weld lines where material flows meet. These spots and fiber orientation strongly influence shear performance.
-
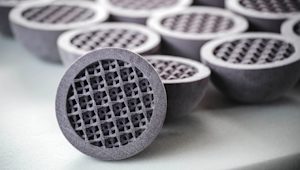
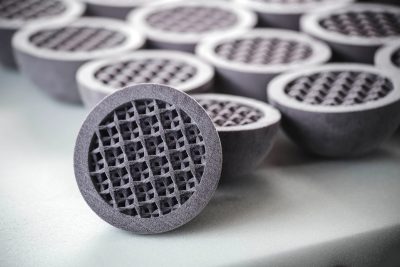
3D printing: Parts are built layer by layer, so shear strength is weaker between layers. Print direction matters for performance.
Choosing materials and finishes
Select the right material and finish to improve shear strength without overcomplicating design:
-
High-strength steels: Great shear strength, sometimes need heat treatment.
-
Aluminum alloys: Strong yet light. Note that 7075 has better shear strength than 6061.
-
Stainless steels: Corrosion resistant with solid shear properties.
-
Engineering plastics: Nylon and polycarbonate balance shear strength with toughness. For comprehensive plastic comparisons, explore our plastics guide.
-
Surface finishes: As-machined works for most applications. Smoother finishes help with repeated loading.
Material comparison for shear applications
| Material | Ultimate tensile strength (MPa) | Typical shear strength (MPa) | Shear/Tensile ratio | Key benefits | Best applications |
|---|---|---|---|---|---|
| Mild steel (A36) | 400–550 | 250–350 | ~0.6 | Low cost, easy to machine, ductile | Structural beams, bolts, general construction |
| Aluminum 6061-T6 | 290 | 180 | ~0.62 | Lightweight, corrosion resistant | Aerospace parts, automotive components, frames |
| Aluminum 7075-T6 | 570 | 330 | ~0.58 | High strength-to-weight ratio | Aircraft fittings, high-performance applications |
| Stainless steel 304 | 500–750 | 300–450 | ~0.6 | Corrosion resistant, strong | Food processing, marine hardware, fasteners |
| Nylon (unfilled) | 70 | 40 | ~0.57 | Tough, flexible, wear-resistant | Gears, bearings, snap-fit joints |
| Polycarbonate | 65 | 35 | ~0.54 | Impact resistant, transparent | Safety equipment, lenses, protective housings |
| Epoxy adhesive (cured) | 60–80 | 25–40 | ~0.45–0.5 | Strong bonding, versatile | Adhesive joints, composite bonding |
Cost and design tips
Good shear design doesn't always come with high costs. Small changes make big differences:
-
Add thickness or overlap instead of using pricier materials.
-
Use standard rated bolts and pins.
-
Avoid unnecessary tight tolerances. Shear isn't highly sensitive to small variations.
-
Favor double-shear designs for nearly double strength.
How Protolabs Network can help
Getting shear-critical parts right is all about designing smart from the start. Protolabs Network manufactures thousands of parts every day, which means we’ve seen where designs tend to fail in shear—and how to prevent it.
Our automated quote builder gives you instant DFM feedback on potential weak points, so you can spot issues before production. If you have specific questions or complex needs, our engineers are on hand to guide you further.
-
Pick the right process: CNC machining, sheet metal fabrication, injection molding, or 3D printing.
-
Choose materials wisely: Our materials database includes shear data.
-
Optimize design: Stronger joints, better inserts, smarter molding.
Get started
Need to manufacture a part that performs reliably under shear loads? Get an instant quote and see automatic DFM feedback in minutes.
Frequently asked questions
How can I tell if my design fails in shear instead of tension?
Calculate both stresses and compare to material properties. Shear often controls in joints and thick parts.
Why is my bolt breaking when rated for the load?
Check if it's in shear—ratings are ~60–70% of tensile ratings.
Should I use the same safety factor for shear and tension?
Usually yes, but shear failures give less warning.
Does surface finish affect shear?
Yes. Smoother surfaces resist cracks better under repeated loading.
Why do 3D printed parts split along layers?
Layer adhesion is weaker than bulk material. Orient layers so shear planes align with layer boundaries.